Back to the drawing board
Things have been quite busy with me lately, especially with the gardening stuff. I'm happy to report that there are TWO peppers popping up out of the ground, and hopefully more on the way. The pictures in this post are sadly non knitting related, and I'll tell you why.
A couple of nights ago I wound my second ball of Koigu and set to work on the Figure 8 cast on, on my new Brittany Birch needles. I had some problems casting on, serious problems. I tried three or four times and I just gave up. It was totally frustrating and I just didn't care anymore. I decided to try on the other sock again and see how it felt, to make sure that it really didn't fit. Yeah, it doesn't. It's too tight, it's to short, it just stinks. And you know what? I don't even like the toe. After all the changes I made, it just isn't comfortable. It really has nothing to do with being the figure-8 versus the turkish, it's the entire shape of the toe. I'm coming to realize that I have some big ol' feet. The toes are wide, the ball of the foot is wide, and the foot is long. So, I've decided, I'm ripping out the first foot, and I'm going go to a top down. Likely a Nancy Bush pattern, because the first socks I did were hers, and I loved it, and I had very few problems. The only thing I want to research are some top down toes. I need to look at some kitchenered toes so that I have more fabric across the top for my wide tootsies. So, anyhow, it's back to the drawing board!
Gardening:
How to make a compost tea brewer
The same night I took another stab at the sock, I had already created this little brewing contraption. It's dead easy to make, as long as you can figure out the pictures on the aquarium peices. I had some issues, but that is likely, not normal. Not much about me is.
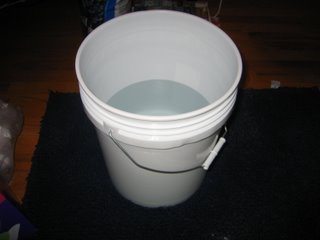
Anyhow, you start with a 5 gallon bucket with water. I chose not to fill mine all the way because I only needed it for my seedlings.

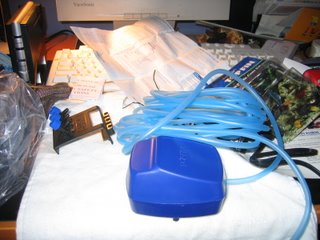
Then get yourself an aquarium bubbler and a gang valve, and some tubing. It helps if you have any idea how this stuff is supposed to work in the first place. I have ritually avoided having fish that need anything other than some food and a water change now and again, so I didn't have a clue - hence the mess and directions everywhere.

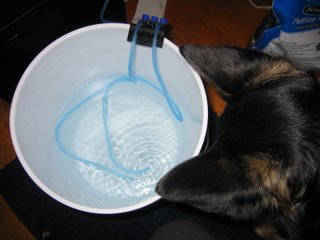
Hook all your peices together and dump them in the bucket. Intrigued dog not required, but highly entertaining.
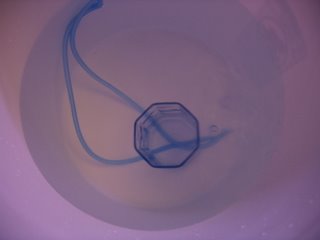
Then realize that the tubing is silicone and that it floats. Consider myriad of odd objects to weigh them down. Try using tupperware, only to come to the realization that it is plastic and plastic floats. Consider how dumb it was to try plastic in the first place. Hope that it's just due to lack of sleep and go back to kitchen for naturally denser object. Retrieve heavy glass and be satisified with the result.
The last thing that I didn't show was the bucket with the compost. I dumped it in there and the water went all brown. Not exactly interesting to look at. The misture should be a 4:1 water:compost ratio - normally 4 gallons of water to 1 gallon of compost.
The mixture is supposed to "brew" (note the water is not hot or anything - in fact I used cold water, and since it was straight from the sink I let it bubble without compost for an hour to decholrinate) for 2-3 days. The purpose of this is to activate the micro-organisms in the compost and to make your plants happy with the fertilizer. The compost tea is a manner of quickly feeding the plants and it's a fertilizer that is organic and can be added to the soil or sprayed on the foliage. There is no risk of burning your plants with the tea the way you can with chemical fertilizers.
I was inspired to make this because of something I read. I had always considered it, but reading about the fact that since my seed starting mixture was soilless, it was therefore nutrient-less, put me over. I realized that it's possible that the remaining zuc and pepper plants hadn't come up because they ran out of steam on the way. Even though the mixture wasn't ready yesterday, I still took some and put it on everyone. I'm thinking I will do this again tonight and spray the foliage as well. I'm a little late starting everyone, and they have a long way to go to be big enough to put outside (well all except the wonder zucchini). I'm sort of thinking that my mixture doesn't look like many organisms got activated. It's not bubbling and thick the way it is on the pictures I saw. I did put sugar into the mixture, the way you would to activate bread yeast, and the web site recommended unsulphured molasses. I don't think that's a very big deal, but it might not have been wise to use rather cold water. Either way, I'm sure that the dissolved compost is better than nothing. I sure did learn plenty from the experiment, and that's all that matters at this point. Any fruit that produces off of any of the plants will make me as happy and as proud as can be. I'm already over the top that anyone came out to play in the first place. =)
Oh, and here is Jordan, baby-sitting the mixture. I'm not sure if she was upset because I used a bathroom mat, that used to be hers, under the mixture to protect the floor, or if she was somehow soothed by the bubbling water, but everytime I open the door to the room, she goes in and lays next to the bucket - well after she gets all her sniffing in, anyhow.
A couple of nights ago I wound my second ball of Koigu and set to work on the Figure 8 cast on, on my new Brittany Birch needles. I had some problems casting on, serious problems. I tried three or four times and I just gave up. It was totally frustrating and I just didn't care anymore. I decided to try on the other sock again and see how it felt, to make sure that it really didn't fit. Yeah, it doesn't. It's too tight, it's to short, it just stinks. And you know what? I don't even like the toe. After all the changes I made, it just isn't comfortable. It really has nothing to do with being the figure-8 versus the turkish, it's the entire shape of the toe. I'm coming to realize that I have some big ol' feet. The toes are wide, the ball of the foot is wide, and the foot is long. So, I've decided, I'm ripping out the first foot, and I'm going go to a top down. Likely a Nancy Bush pattern, because the first socks I did were hers, and I loved it, and I had very few problems. The only thing I want to research are some top down toes. I need to look at some kitchenered toes so that I have more fabric across the top for my wide tootsies. So, anyhow, it's back to the drawing board!
Gardening:
How to make a compost tea brewer
The same night I took another stab at the sock, I had already created this little brewing contraption. It's dead easy to make, as long as you can figure out the pictures on the aquarium peices. I had some issues, but that is likely, not normal. Not much about me is.
Anyhow, you start with a 5 gallon bucket with water. I chose not to fill mine all the way because I only needed it for my seedlings.

Then get yourself an aquarium bubbler and a gang valve, and some tubing. It helps if you have any idea how this stuff is supposed to work in the first place. I have ritually avoided having fish that need anything other than some food and a water change now and again, so I didn't have a clue - hence the mess and directions everywhere.

Hook all your peices together and dump them in the bucket. Intrigued dog not required, but highly entertaining.

Then realize that the tubing is silicone and that it floats. Consider myriad of odd objects to weigh them down. Try using tupperware, only to come to the realization that it is plastic and plastic floats. Consider how dumb it was to try plastic in the first place. Hope that it's just due to lack of sleep and go back to kitchen for naturally denser object. Retrieve heavy glass and be satisified with the result.

The last thing that I didn't show was the bucket with the compost. I dumped it in there and the water went all brown. Not exactly interesting to look at. The misture should be a 4:1 water:compost ratio - normally 4 gallons of water to 1 gallon of compost.
The mixture is supposed to "brew" (note the water is not hot or anything - in fact I used cold water, and since it was straight from the sink I let it bubble without compost for an hour to decholrinate) for 2-3 days. The purpose of this is to activate the micro-organisms in the compost and to make your plants happy with the fertilizer. The compost tea is a manner of quickly feeding the plants and it's a fertilizer that is organic and can be added to the soil or sprayed on the foliage. There is no risk of burning your plants with the tea the way you can with chemical fertilizers.
I was inspired to make this because of something I read. I had always considered it, but reading about the fact that since my seed starting mixture was soilless, it was therefore nutrient-less, put me over. I realized that it's possible that the remaining zuc and pepper plants hadn't come up because they ran out of steam on the way. Even though the mixture wasn't ready yesterday, I still took some and put it on everyone. I'm thinking I will do this again tonight and spray the foliage as well. I'm a little late starting everyone, and they have a long way to go to be big enough to put outside (well all except the wonder zucchini). I'm sort of thinking that my mixture doesn't look like many organisms got activated. It's not bubbling and thick the way it is on the pictures I saw. I did put sugar into the mixture, the way you would to activate bread yeast, and the web site recommended unsulphured molasses. I don't think that's a very big deal, but it might not have been wise to use rather cold water. Either way, I'm sure that the dissolved compost is better than nothing. I sure did learn plenty from the experiment, and that's all that matters at this point. Any fruit that produces off of any of the plants will make me as happy and as proud as can be. I'm already over the top that anyone came out to play in the first place. =)
Oh, and here is Jordan, baby-sitting the mixture. I'm not sure if she was upset because I used a bathroom mat, that used to be hers, under the mixture to protect the floor, or if she was somehow soothed by the bubbling water, but everytime I open the door to the room, she goes in and lays next to the bucket - well after she gets all her sniffing in, anyhow.


3 Comments:
I am sorry to hear about your sock. :( I hope you find a decent toe for your new ones! I also tried the figure 8 cast on and I could not figure it out for the life of me. It kept falling apart. I have never heard of compost tea. That was very interesting and I hope that it works. You may be able to get unsulphered molassas at Trader Joe's or Wegman's if you have either of those near you.
By knitfriendly, at 8:30 AM
If you like short row socks (I love them and I have duck feet that get wider at the front) you can do a provisional cast on, then just start knitting the short row toe and pick up the provisional stitches when you start knitting the foot. I still do most socks top down, but it's a great solution when yarn quantities are questionable.
By Brynne, at 9:50 AM
Sock Queen checking in!
If you want to try the Turkish Cast On, you can cast on as many stitches as you need for your toe! Figure out how many inches across you'd like you toe to be and based on your gauge, cast on that # of stitches. Example: gauge = 8sts/inch - you want a 3 inch flat toe, cast on 24 stitches which means 12 wraps for the Turkish Cast On, easy peasy! Don't stress Jes dear, it's only a sock and knitting is fun :)
By Debi, at 11:03 AM
Post a Comment
<< Home