Banner

Friday, April 28, 2006

Proof

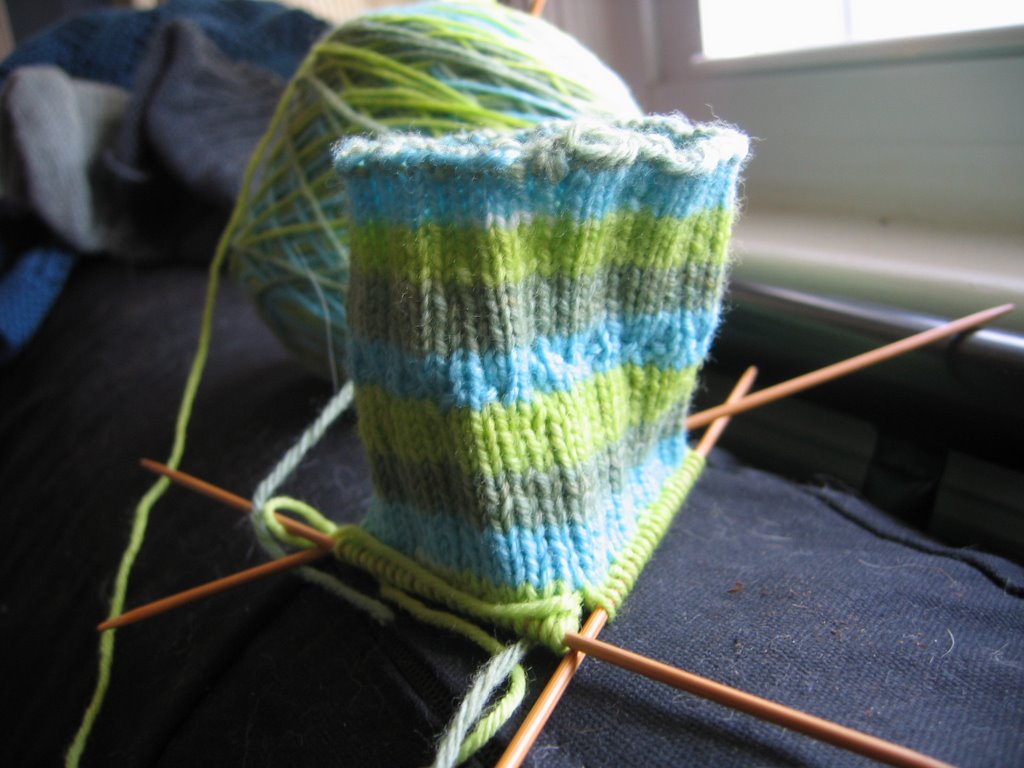
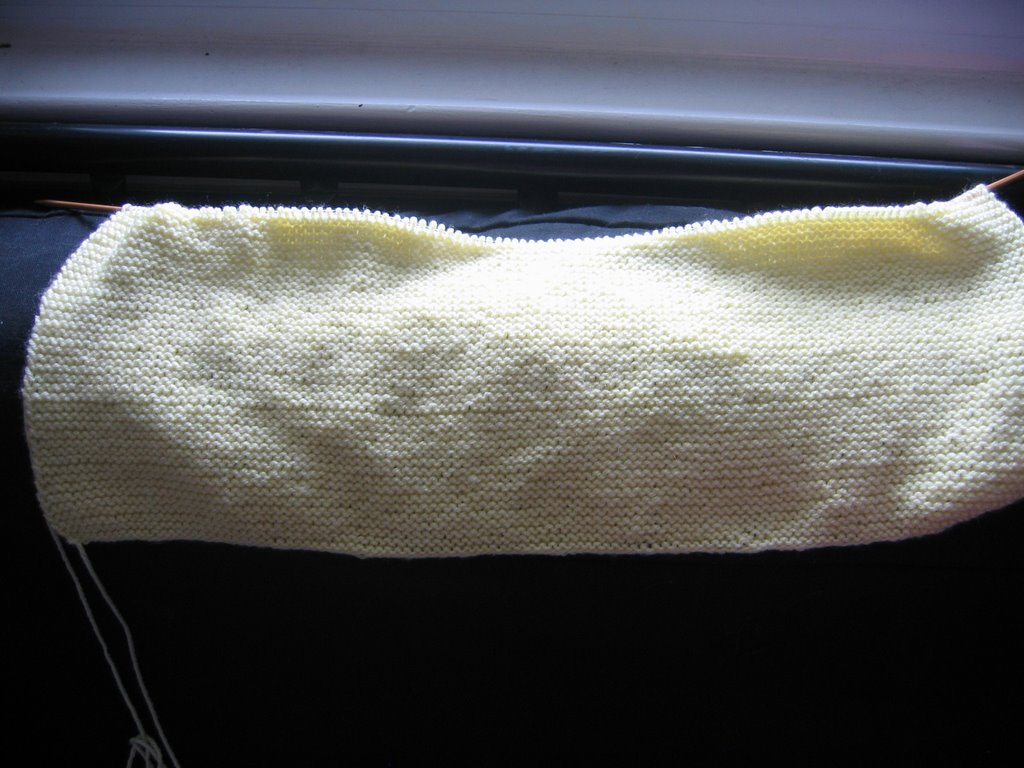
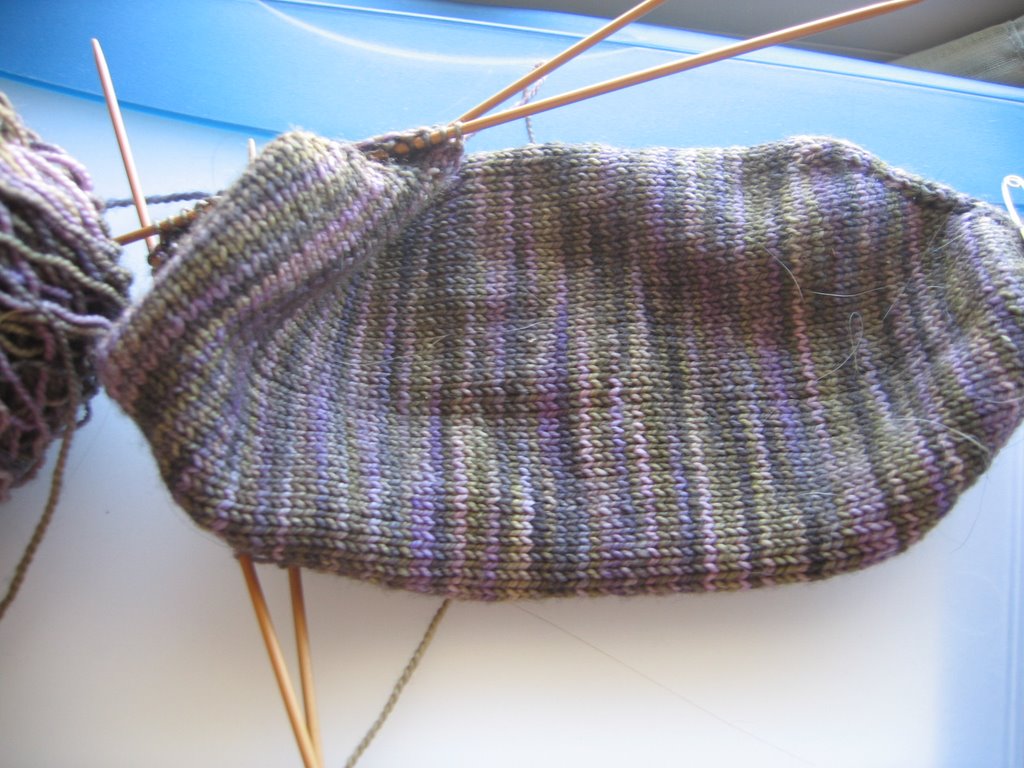
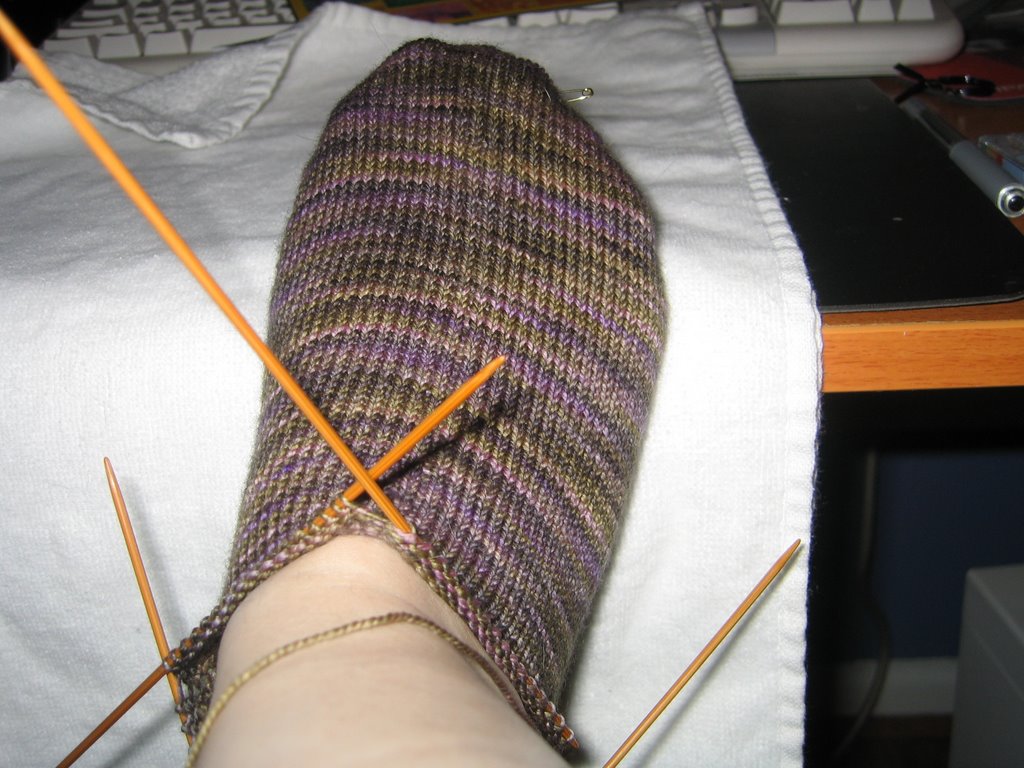
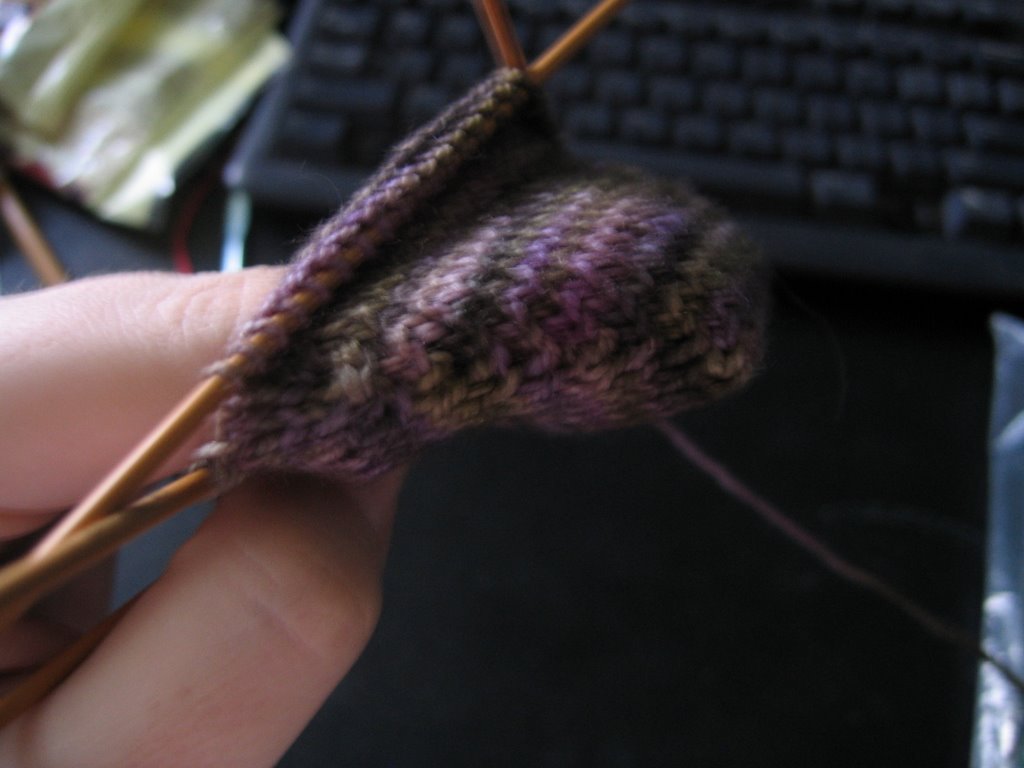
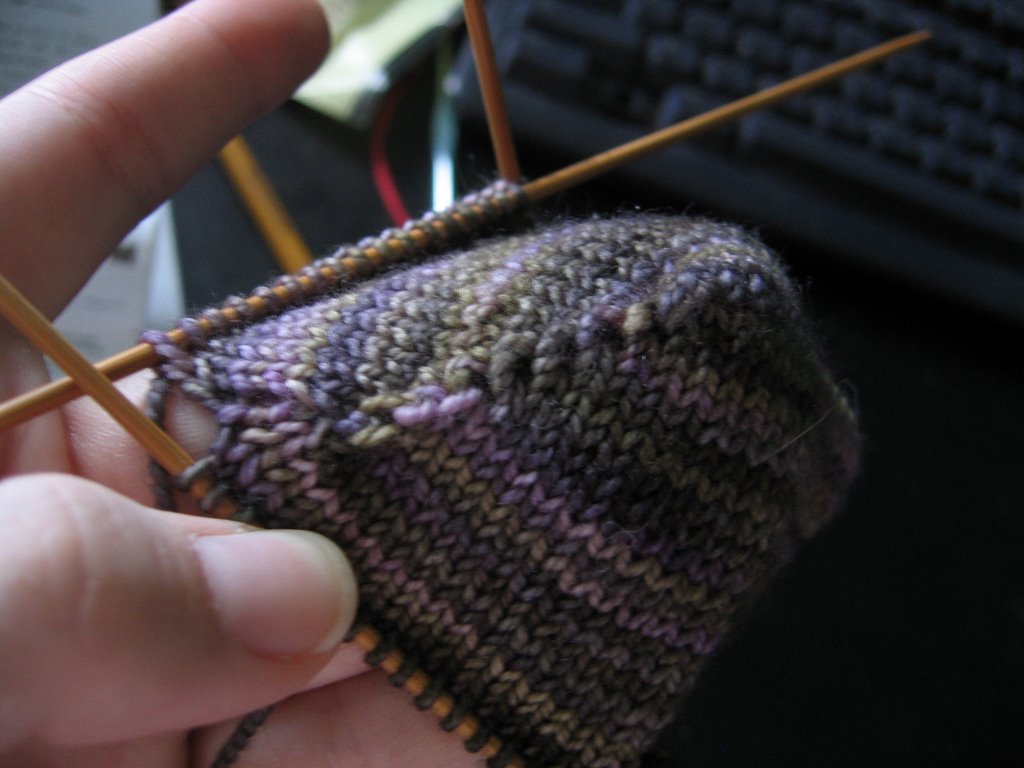
I do knit. You wouldn't know it from this blog lately, but I do. See? This is (still) the leg of the first sock. I've been working on it exclusively all week, with what little time I've had. I've decided that I can go another inch or so before starting the heel flap without constricting my calves too much. The change in pattern is really helping with the overall sizing, and I'm really liking the ribbing pattern. Just enough purls to make it interesting, but not so many you slow down to an absolute crawl. I do still have to throw when I use dpns, so I'm already going slower than I normally would, but I must say that I'm surprised I've gotten this far down the leg so fast, especially with all the set backs. This Vesper yarn is a bit thicker than the Lorna's and I must say, I really like that. It's a little itty bit scratchy right now, but I think some Euclan will soften it right up. Plus, despite this horrid picture, the colors are just so great. They keep my eyes entertained, and the striping pattern is about 4-5 stitches wide, so just about the time you're tired of the color, a new one appears and that means you've gone about a little less than half an inch. I do about 4 stripes a night, so I feel like I'm flying. If I could ever catch more Vesper when it's online, I would totally order more. However, with the Sheep and Wool festival a little more than a week away, I'm trying to practice some self restraint. I have some sock yarn money put away and Heather and I are bolting straight to the Socks that Rock!

And because I simply couldn't resist some more garden pictures, here they are below.
Have a great weekend!
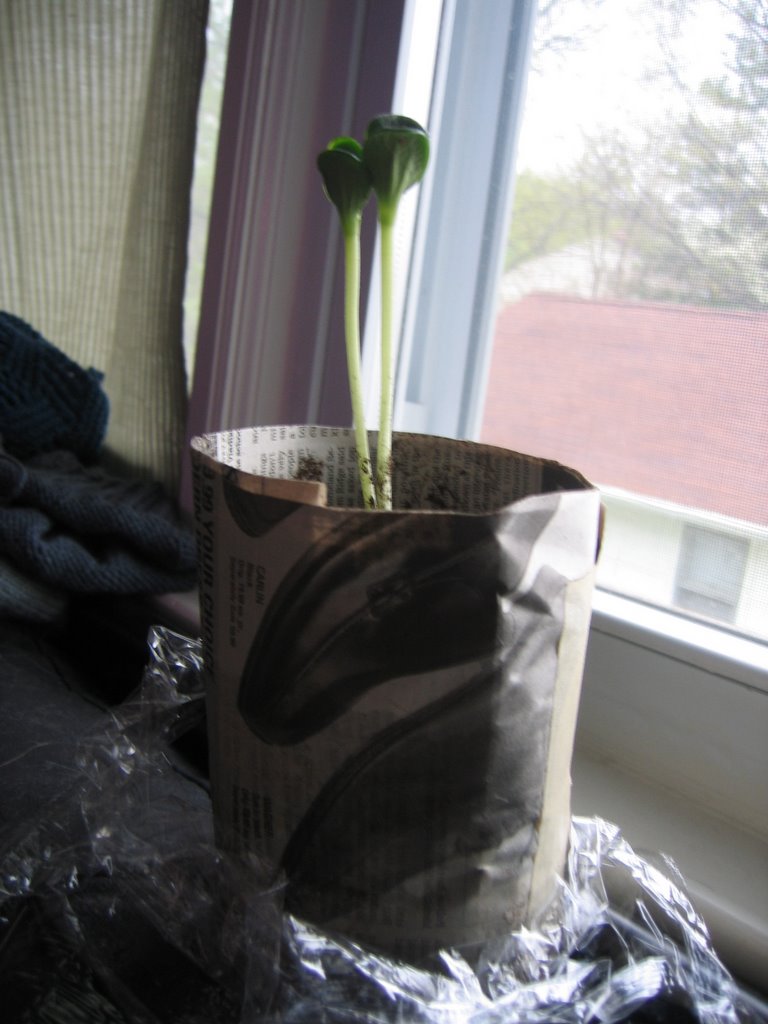
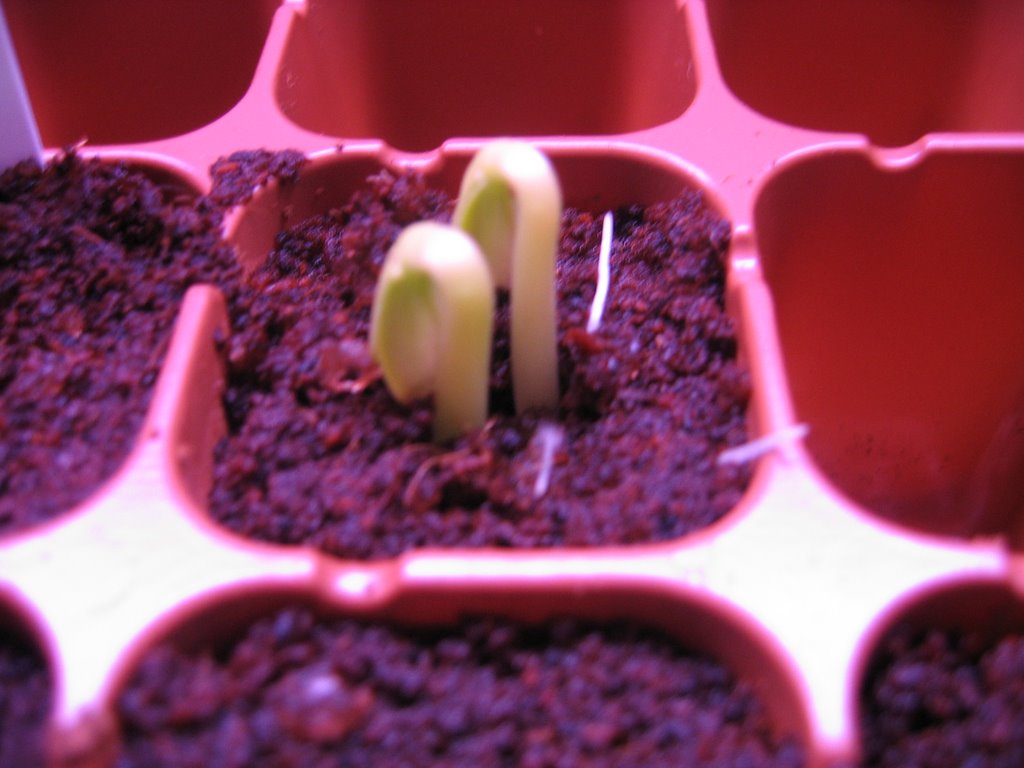
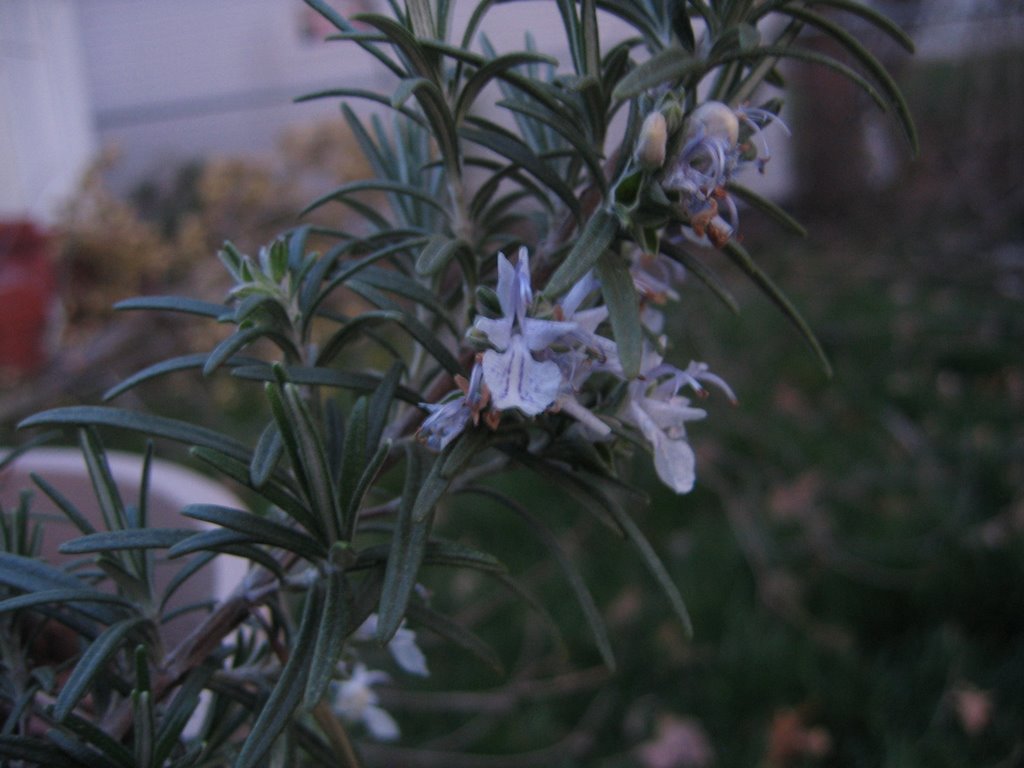
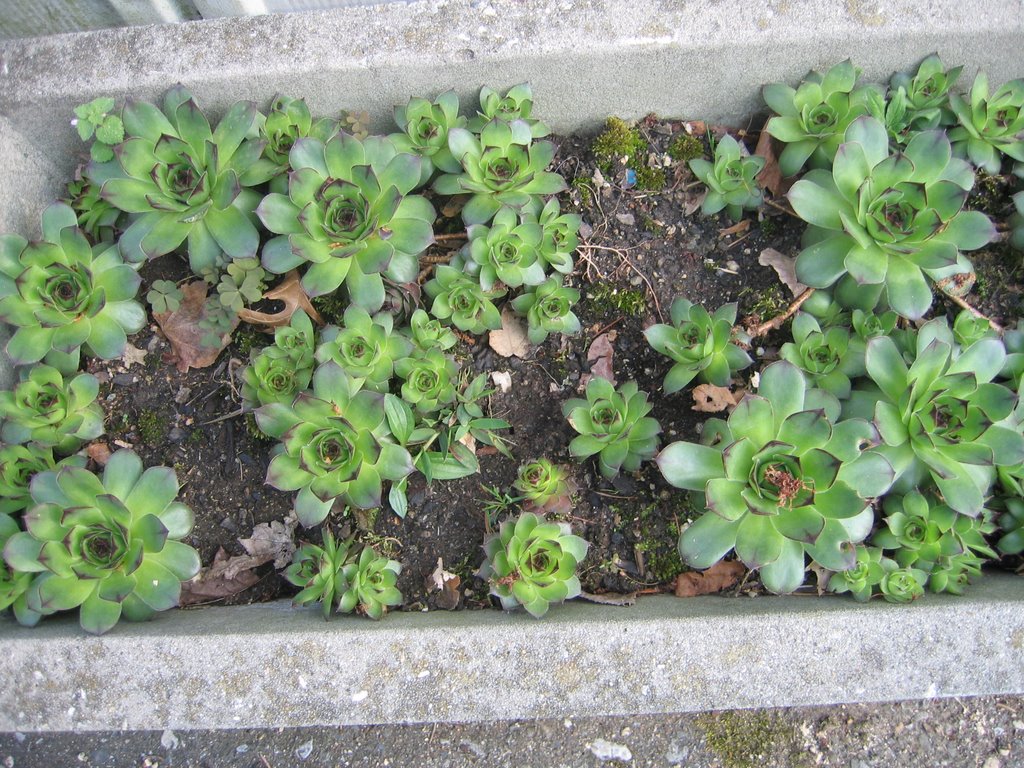
These are called Chicks and Hens. Forgive me, I'm not into the latin names. Anyhow, these guys were fighting some mint for control over this cement planter when we bought the house. I didn't even think anything was in this planter at first. So I ripped out the moss and the mint and the next thing I knew, these guys were sprouting up. Now they're all over the planter and they rule their roost!
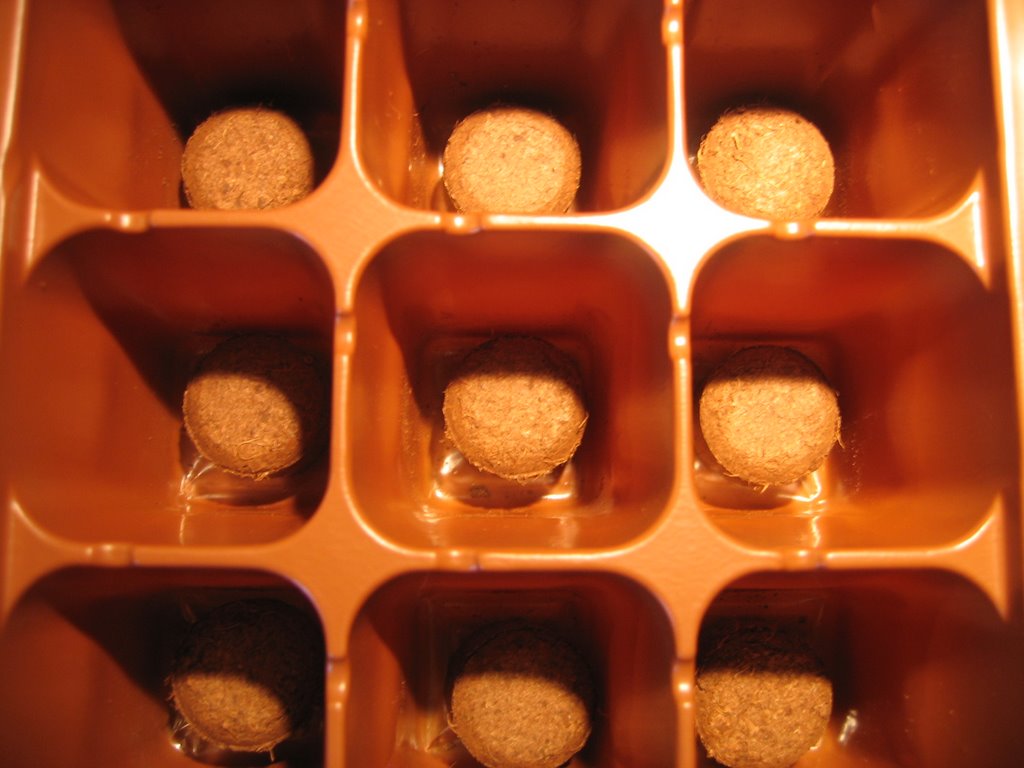
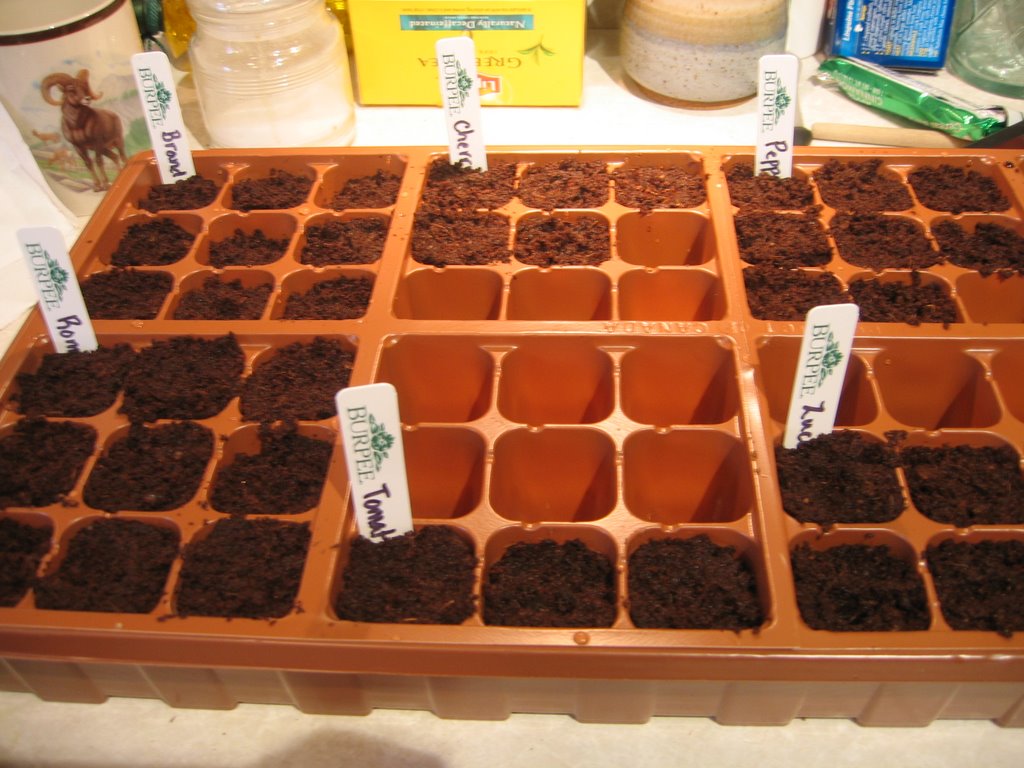
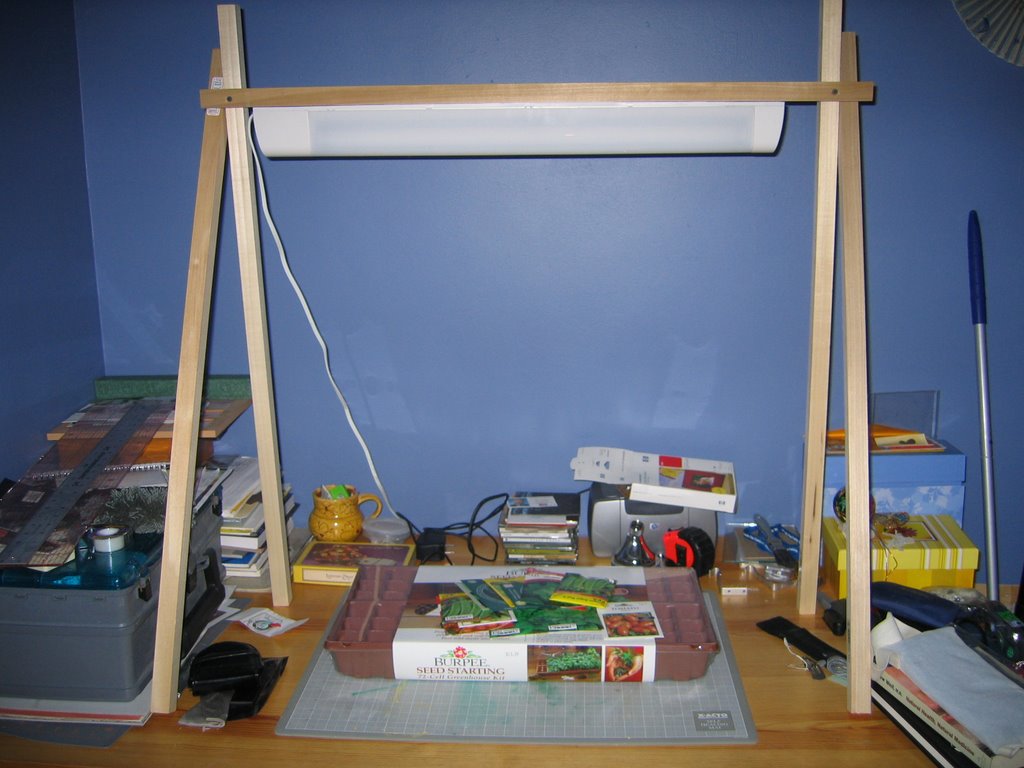
Here's a wide shot of the seedlings. I've had to increase the real estate that's close to the light. I see now why they make those light stands with the chains. Much easier to raise and lower the light than the plants. The paper pots are all the plants I repotted who were out growing the flat. More can come out, but they're not dying to yet, so I left them. That way they're warmer because of how they sit on the heating pad that's under the blue towel.

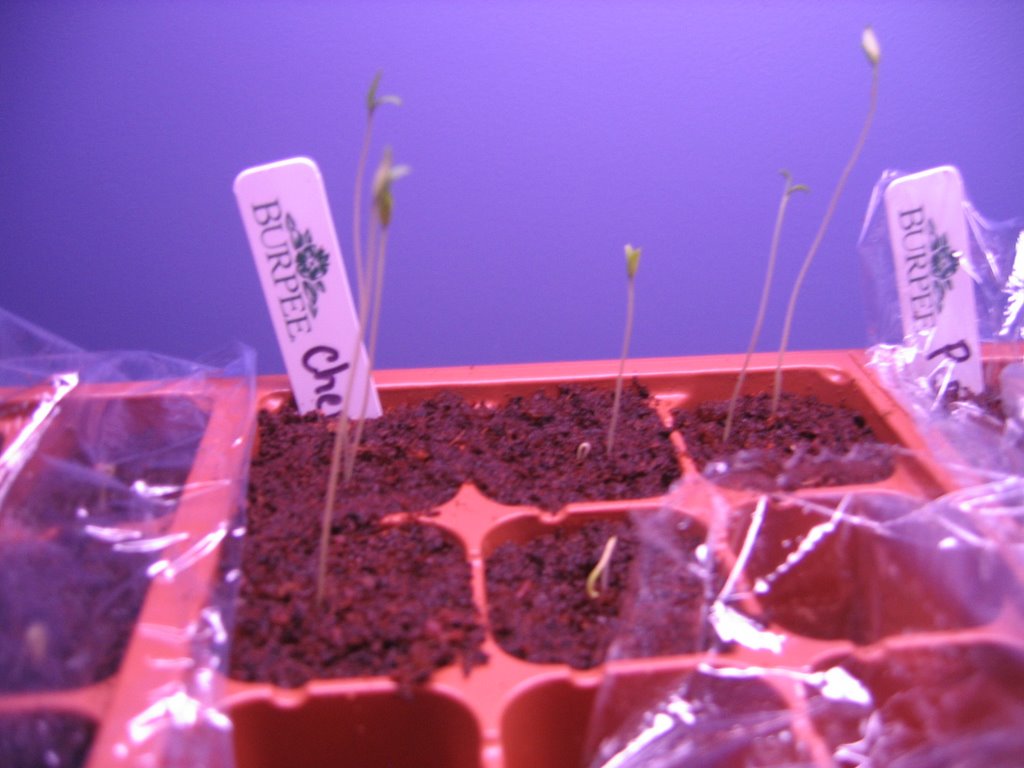
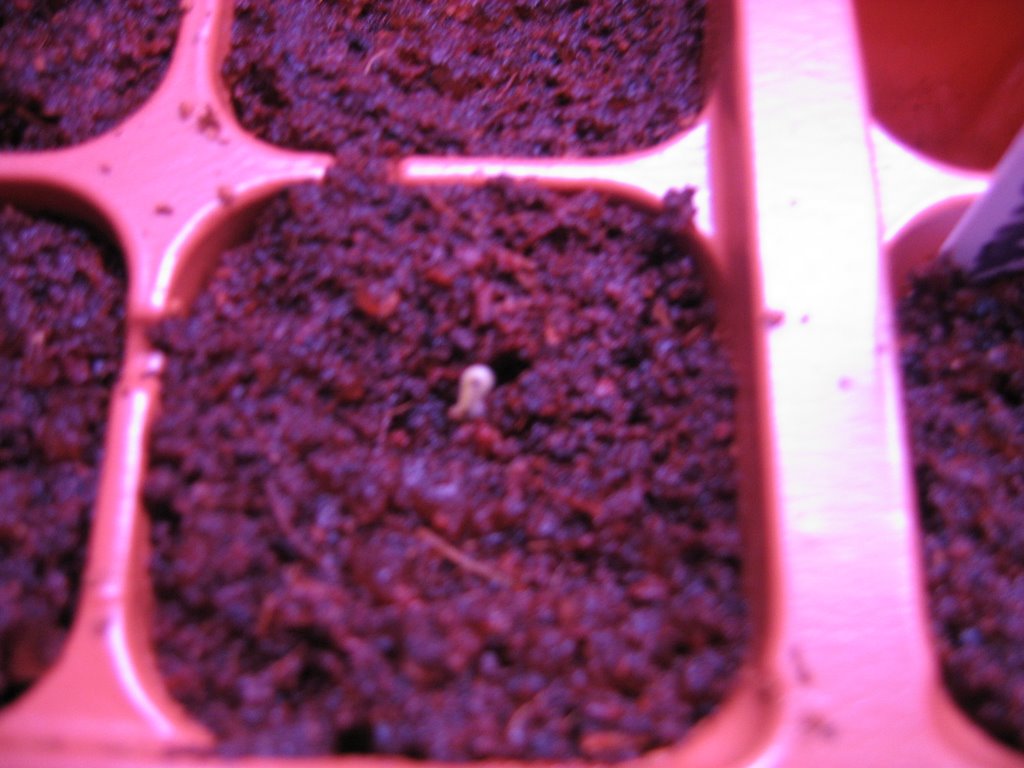
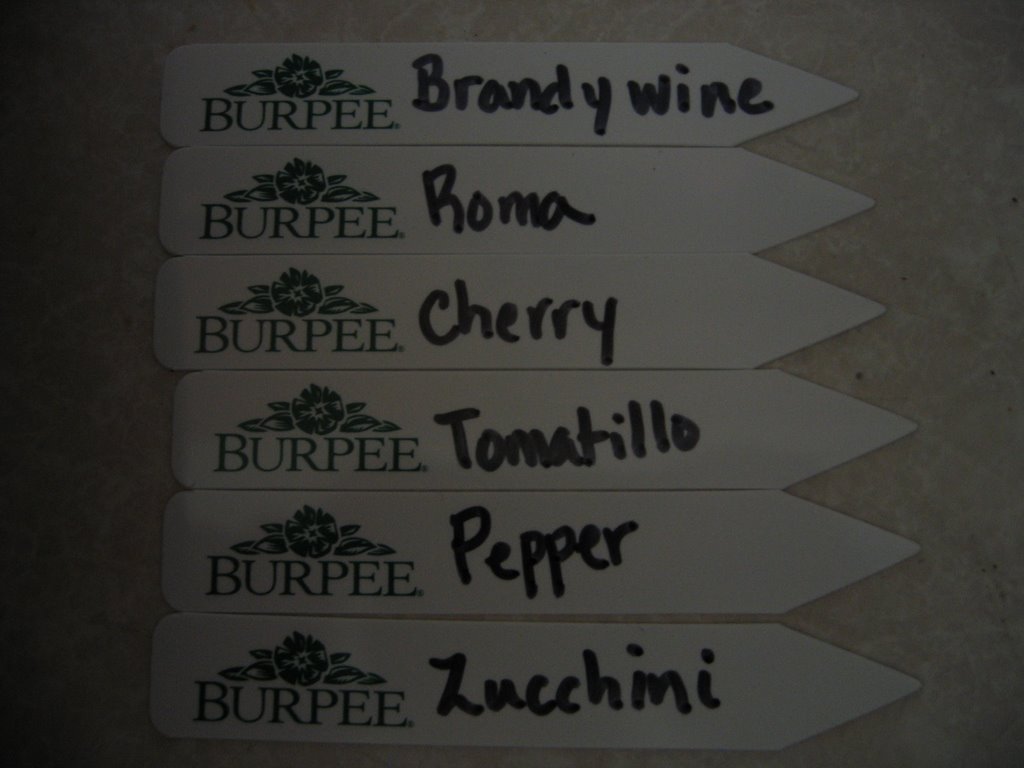
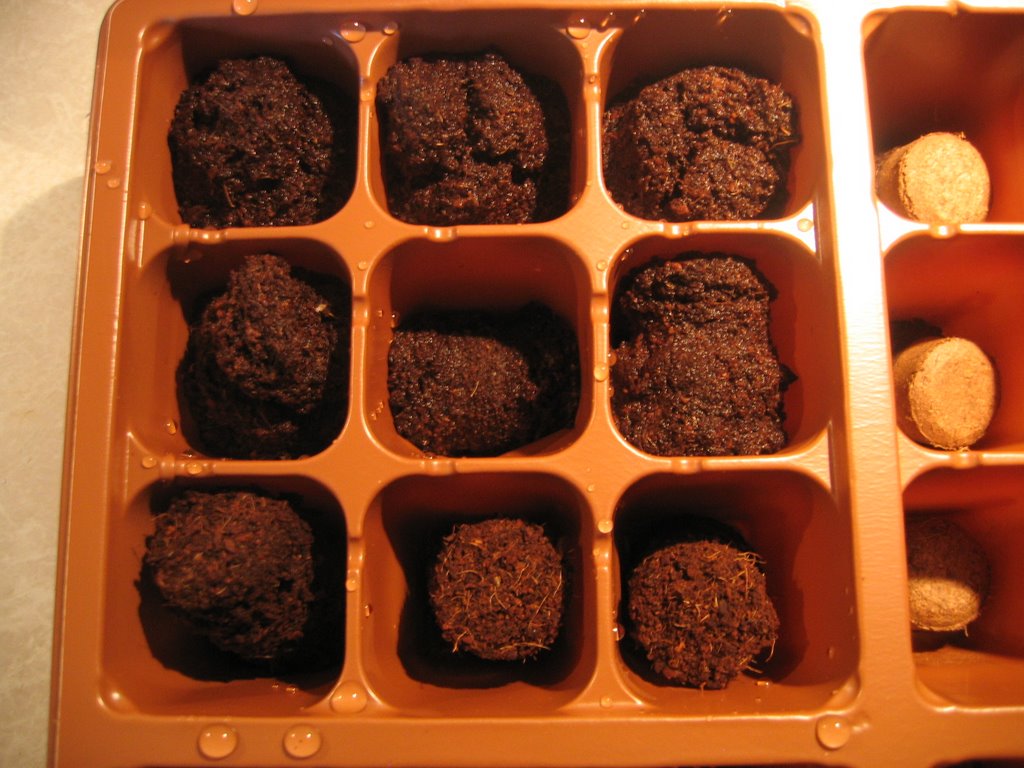
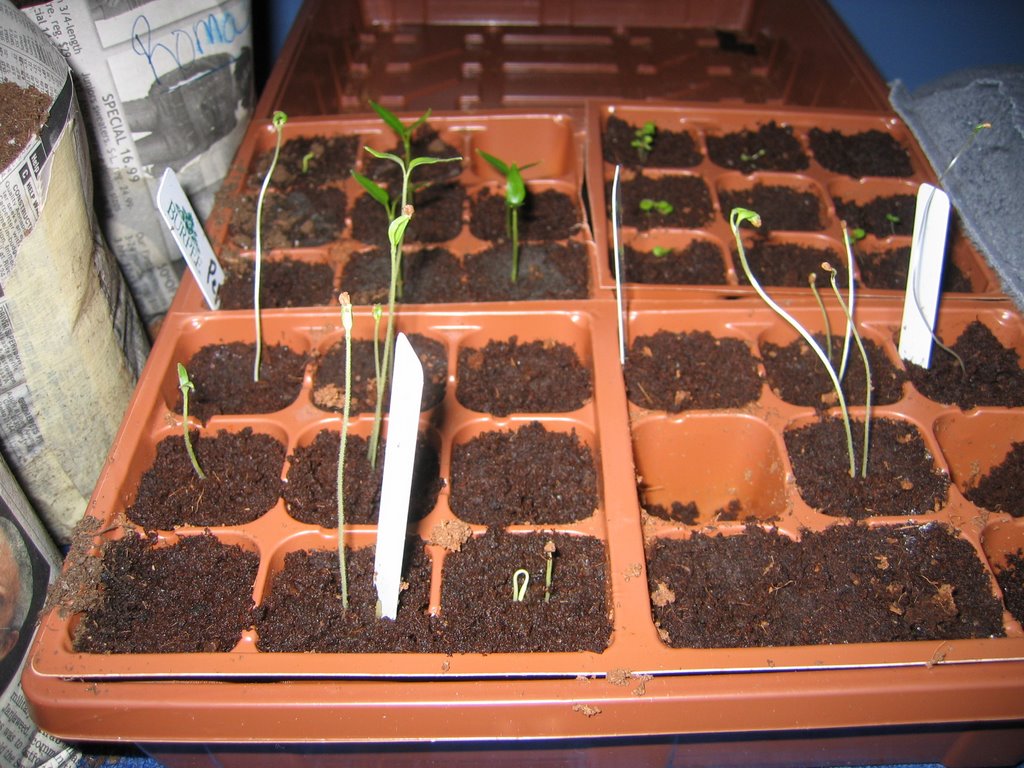
And lastly, a close up of the flat. Peppers on the back left, 7 million dollar flowers back right, Brandywine tomatoes close left, one freaky growing tomatillo and the couple of Romas that weren't ready to repot close right. All the cherry tomatoes and most Romas and the one tomatillo got repotted. None of the other zucchinis came up at all. I actually dug some of the seeds out to see what happened, and no one else germinated. I'm going to take a stab at it again soon and plant the ones that germinate, right into their mound. Ofcourse none of them could match the craziness of the super zucchini.

Tuesday, April 25, 2006

Strangely similar

Looking at this picture might give you a sense of deja vu. Like you've seen it somewhere before. Like it doesn't look any different than it did the last time, except..... What is it that's wrong? Is it the striping that's changed, the ribbing, the entire pattern, perhaps? Yeah, it's that last one. Despite having gotten through the first 3 inches or so of the madder rib, it had to be ripped. I kept trying it on, and looking at it, and it just didn't seem right. Despite going over my foot quite nicely, and over my heel well - as well as can be expected when there are three pointy sticks in it - it just didn't work on my fat shapely calves. It's not that it didn't stretch enough, I was able to pull them up and over, but the pattern got all stretched out, and it was not flattering. Yeah, it's the bit that's going to be hidden, but it looked terrible, and I just couldn't live with it. I considered my options
a) suck it up, make the sock, lose weight, deal.
b) suck it up and make the sock for someone with daintier calves
c) rip it out and throw the yarn out the window
d) rip it out and start again with an extra pattern repeat (bringing total sts to 70 AKA too many)
e) rip it out and add 1 k st to all the wide ribs (bringing total sts to 67 but screwing up pattern)
f) rip it out, start again with larger needles, hate the fabric it makes, rip it out again, go back to size 1s, pick a different pattern, knit that, take picture, blog about it. Be happy(er).

I think you know what I did. This is the yarrow ribbed pattern, btw. It has 66 sts instead of 60, which works out better all the way around.

And now to distract you from my total lack of forward progress on any thing knit, I present to you some preformance art that happens in our house daily. I give you:

Cat lounging in a bath tub

Fuzzy picture due to cat's complete inabilty to hold still for more than a milisecond, except while being cute (which only happens while sleeping) and you don't have your camera.

Friday, April 21, 2006

Quick! Look! Knitting!

I know, I know, it's a major surprise. No one have a heart attack, okay?
I have been knitting, but it's been boring and slow, and not very interesting to blog about, but this is actually interesting. It's my replacement sock for the toe up drama babies. I ripped the needles out of that puppy, paged through my Knitting Vintage Socks, and decided on the Madder Ribbed. Here you see the cuff and the first few rows of the leg. I'm so very happy now. I love the colors, I love the one less needle, I love the pattern. The only alterations I will make are to add more stitches to the feet and to change it to a flat toe instead of a gathered one. I've even decided to do this on 1s and knit looser. That should make Lady Deb happy. ;) Doing it is actually taking some restraint not to yank on the yarn constantly, but my hands are much happier.

The yarn, in case you're wondering, is Vesper - color knit and tonic. I should have divided it into two balls, one for each sock, but I've decided that at 440 yards, the chances of me running out of yarn are almost non existent. It's equivalent to the Lorna's Laces yardage and I have a ton of that leftover, so it's all good. Also, I have no scale or yarn meter to do such dividing, so it's a moot point anyhow. Just to show you the magnitude of this yarn, here's the full hank wound next to one hank of koigu. That's a lotta' yarn!

Wednesday, April 19, 2006

Back to the drawing board

Things have been quite busy with me lately, especially with the gardening stuff. I'm happy to report that there are TWO peppers popping up out of the ground, and hopefully more on the way. The pictures in this post are sadly non knitting related, and I'll tell you why.
A couple of nights ago I wound my second ball of Koigu and set to work on the Figure 8 cast on, on my new Brittany Birch needles. I had some problems casting on, serious problems. I tried three or four times and I just gave up. It was totally frustrating and I just didn't care anymore. I decided to try on the other sock again and see how it felt, to make sure that it really didn't fit. Yeah, it doesn't. It's too tight, it's to short, it just stinks. And you know what? I don't even like the toe. After all the changes I made, it just isn't comfortable. It really has nothing to do with being the figure-8 versus the turkish, it's the entire shape of the toe. I'm coming to realize that I have some big ol' feet. The toes are wide, the ball of the foot is wide, and the foot is long. So, I've decided, I'm ripping out the first foot, and I'm going go to a top down. Likely a Nancy Bush pattern, because the first socks I did were hers, and I loved it, and I had very few problems. The only thing I want to research are some top down toes. I need to look at some kitchenered toes so that I have more fabric across the top for my wide tootsies. So, anyhow, it's back to the drawing board!

Gardening:

How to make a compost tea brewer

The same night I took another stab at the sock, I had already created this little brewing contraption. It's dead easy to make, as long as you can figure out the pictures on the aquarium peices. I had some issues, but that is likely, not normal. Not much about me is.

Anyhow
, you start with a 5 gallon bucket with water. I chose not to fill mine all the way because I only needed it for my seedlings.


Then get yourself an aquarium bubbler and a gang valve, and some tubing. It helps if you have any idea how this stuff is supposed to work in the first place. I have ritually avoided having fish that need anything other than some food and a water change now and again, so I didn't have a clue - hence the mess and directions everywhere.


Hook all your peices together and dump them in the bucket. Intrigued dog not required, but highly entertaining.
Then realize that the tubing is silicone and that it floats. Consider myriad of odd objects to weigh them down. Try using tupperware, only to come to the realization that it is plastic and plastic floats. Consider how dumb it was to try plastic in the first place. Hope that it's just due to lack of sleep and go back to kitchen for naturally denser object. Retrieve heavy glass and be satisified with the result.
The last thing that I didn't show was the bucket with the compost. I dumped it in there and the water went all brown. Not exactly interesting to look at. The misture should be a 4:1 water:compost ratio - normally 4 gallons of water to 1 gallon of compost.
The mixture is supposed to "brew" (note the water is not hot or anything - in fact I used cold water, and since it was straight from the sink I let it bubble without compost for an hour to decholrinate) for 2-3 days. The purpose of this is to activate the micro-organisms in the compost and to make your plants happy with the fertilizer. The compost tea is a manner of quickly feeding the plants and it's a fertilizer that is organic and can be added to the soil or sprayed on the foliage. There is no risk of burning your plants with the tea the way you can with chemical fertilizers.

I was inspired to make this because of something I read. I had always considered it, but reading about the fact that since my seed starting mixture was soilless, it was therefore nutrient-less, put me over. I realized that it's possible that the remaining zuc and pepper plants hadn't come up because they ran out of steam on the way. Even though the mixture wasn't ready yesterday, I still took some and put it on everyone. I'm thinking I will do this again tonight and spray the foliage as well. I'm a little late starting everyone, and they have a long way to go to be big enough to put outside (well all except the wonder zucchini). I'm sort of thinking that my mixture doesn't look like many organisms got activated. It's not bubbling and thick the way it is on the pictures I saw. I did put sugar into the mixture, the way you would to activate bread yeast, and the web site recommended unsulphured molasses. I don't think that's a very big deal, but it might not have been wise to use rather cold water. Either way, I'm sure that the dissolved compost is better than nothing. I sure did learn plenty from the experiment, and that's all that matters at this point. Any fruit that produces off of any of the plants will make me as happy and as proud as can be. I'm already over the top that anyone came out to play in the first place. =)

Oh, and here is Jordan, baby-sitting the mixture. I'm not sure if she was upset because I used a bathroom mat, that used to be hers, under the mixture to protect the floor, or if she was somehow soothed by the bubbling water, but everytime I open the door to the room, she goes in and lays next to the bucket - well after she gets all her sniffing in, anyhow.

Monday, April 17, 2006

Under achiever and Over acheiver

The under acheiver: me
This is the garter stitch blanket that I've been working on. It's my mindless knitting. Sadly, it's been about all I can handle lately. I'm working it continental style, which I really needed for awhile after I knit that first toe up sock in about three days. You know, the sock that I screwed up the heel on, and haven't touched since? Yeah, that one. So, in lieu of having the mental energy to start the second sock so I could get the heel right on that one, I've been working on this. I think it's around 150 stitches across on US 5. It's not huge, but it's a nice size for a preemie or newborn, which is who it's planned for. I've planned it to be yellow blue yellow and I've started the blue stripe in the middle. I've only done 2 rows of the blue so far because the neighbors were having a crazy party and I couldn't take the noise of the window rattling from their bass and longer. I'm sure I'll be working on this a lot, especially considering how much work I've been doing and will be doing in the garden, and how tired it's making me. I also wouldn't be surprised if when I'm done this, I start another. It might just be the summer of the blanket.

The over acheiver: the plant
This not so little anymore zucchini plant is crazy. It popped up out of the ground only 3 days after it was planted, and by two days lafter that I had to prop up the lid to the container because it was touching it. I had to run out and get transplanting supplies so that I could get it out of there. So I got some soil and a 3" peice of PVC coupling and made some paper planters for them. These are the only over acheivers who have warranted a transplant. This plant is around 5" tall now, and none of the other zucchini seeds (of which there are 2 in each pot) have even surfaced yet. Neither have any of the pepper plants. I've still got hope and fingers and toes crossed for them. I figure I'm okay with only one zuc since they say if you're going to have a zucchini plant, you'd better have friends.... but I really have hopes for the peppers. I love to eat peppers, and I'd be sad to be without them. At least I still have time to break down and buy them at the nursery if none of these 8(!) come up.
Anyhow, everybody else looks like this, quite a contrast, but they're all growing in proportion to their seeds. And it doesn't matter anyhow, cuz they're so darn cute!

Wednesday, April 12, 2006

Overnight Success...almost

Okay, to start I just want to check that I'm not boring you with all my gardening stuff. It is sort of consuming my life right now, and by nature, the blog as well. I am going to try to make it clear about which part is gardening and which is knitting so you're not reading some intense horticultural post when you don't give a flying you know what....
Anyhow, this is about gardening and below is about knitting.

Yesterday, I went into check on the ol' seeds after taking a two hour nap that I apparently didn't know I needed, and I spotted these guys. I only planted these babies on Sunday, and look how big they were this morning. It's amazing to me, since the earliest anyone was supposed to show their face was after ten days or so. I suppose that 10-14 day timeline means until everyone is up and running, not just sprouting up.


The picture on the left is zucchini which is why they are so huge. Those seeds are large and in charge, but I still planted two per pint. Ofcourse there are two coming up in one pint and none in the others, but I'm not worried. The picture on the right is a roma tomato that wasn't there last night and literally sprouted above the dirt and this tall overnight. There are two cherry tomatoes coming up too, but they pretty much look like the roma. It not seem like a big deal but a tomato seed is about the size of a small sesame seed, so they have a long ways to go.
I really can't express how excited I was to see these guys popping up. Literally, jumping up and down, yelling, and doing the happy dance. Think the feeling that you get when you were sure you were going to run out of that discontinued yarn in the rare colorway that has marinated in the stash for years - waiting for the perfect pattern you just found - that no one has any left overs of and you were sure you were going to run out of, but finish the sweater with only a few yards to spare. It's that kind of success for me. And as soon as at least one of every kind of plant in there makes its debut I will feel the relief that you get after you have seemed and blocked and gifted or worn said beautiful sweater =)

*~*~*~*~*~*~*~*KNITTING CONTENT BELOW~*~*~*~*~*~*~*~*
Today I made a trip over to ye olde local yarn store to browse and pick up some more needles. I was willing to take any of the kinds of needles that I don't have to finish any of the projects that are lying around the house unfinished. Now, I like my yarn store, she has a good selection, a nice space, a fairly friendly atmosphere, but the needle selection makes me sad. I know that most people would be elated to see rows and rows of brittany and addi on the shelves in every length and size, but it annoys me. Alright, I'm coming out and saying it, I hate Addi's. Both kinds. The nickel ones are too blunt, they hurt my hands, and no matter what I'm working on, are too slippery. The Natura ones are okay, but the join is hateful. I have tried knitting with worsted and with fingering on my only pair of 5s and every yarn I've tried gets stuck in that join. I know many of you like them, and to each his own, but I can't stand them. Maybe someday I'll change my tune, but for now, I'm sticking by my Crystal Palace. All shapes, all sizes, all lengths. Mwah.
ANYHOW....rant over. As I didn't manage to be able to find any of the circs I needed to finish elephant or to do turkish cast on, I hunted through the dpns. I grabbed a set of brittany birch 5" size 1s. I've decided that to separate myself from the angstd that I feel for the sock that is too short with the heel I care not to knit again, so I'm going to start on the new skein and work the foot and try another heel. By the time I finish that sock, I will be over my pain and anger mostly and won't feel as
bad about ripping out the heel and knitting just a little bit longer a foot. My plan is to use the short row YO heel as seen here and as advised by my sock queen. It boggles my mind slightly just from looking at the pictures, but new things always do. This is why I have the one new thing at a time rule. I can multi-task a lot of things, but learning is not one of those things. So, when I get to the hell heel, which won't be for awhile, I will sit me down in front of the computer and figure it out. For now, I'm pretending like there is no heel, in order to release some stress I have related to this little pockety goodness.
So, soon, some pictures of the other sock, and of the garter stitch blanket that I'm working on - you know for the slow mental days, and the hat I never blogged, and so forth. Until then, I will be knitting in the times that I can tear myself away from watching the flowers vegetables grow.

Tuesday, April 11, 2006

A little bit frustrated...

Point 1:
Yesterday was the first warm day we've had in awhile and I was excited to get home and get some weeding done. I've needed to get my lettuce and bean bed planted for a week or so now and I've gotten nowhere. So last night I took myself out there and ripped up a 5 gallon bucket chcked full of spring onions that had somehow over run this bed in a matter of a year. Last year I don't recall there being much of anything in the bed before I planted flowers, and this year they are suddenly the masters of they survey. But no more. However, this bed is under a large tree and everywhere I hacked to get the onions out I hit tree root. Now this tree isn't doing so hot as it is, so I feel compelled to not rip up all it's little roots just to get spring onions out and lettuce in. So, after working for 2 straight hours on weeding, I decided that I needed to build a raised bed. Yes, I'm glad I got the weeding done, but it's a little annoying.

Point 2:
This sock that is going to drive me to drink....more. It's the Wendy's generic toe up pattern...sorta. I've had to increase the needle size to 1 (she says 0) add 4 more stitches to make 68 (her plans 60 and 64) and decided to use the figure 8 cast on instead of the short row toe. I liked the look of the short row, but I had all those issues with the purl and the knit wraps. Ofcourse I come to find out that I was a) knitting the wraps wrongly and b) didn't have to knit them at all. Also frustrating.

Point 3:
Okay it's still the sock, but it's a different problem. I was doing fine until I got to the heel directions. With some help from Deb, I found a bunch of other options, but got a little overwhelmed and decided to just give the short row heel by Wendy a try. I found that I didn't have to knit the wraps, and that helped a lot. Even knitting the wraps the right way left me with a hole, so I fixed them and moved on. Last night I put the sock on, seen here, and found that the length of the foot is just a hair too short to be comfortable. Now I have to either rip and reknit or hope that blocking helps. Well, you know me, I won't leave it and have to rip it . However, I'm going to give another heel a try. I don't mind making short rows in the least, but when you have a large number of stitches on one needle, say 34 or so, it becomes very uncomfortable to knit. It's not the end of the world, just frustrating.

Point 4:
I cannot for the life of me get a good picture of this sock color. Natural light, flash, no light - nothing works. You guessed it - frustrating.

Point 5:
Not having enough of the right size needles to do the Turkish cast on for the sock (hence the figure 8 instead) or to work on my elephant for my mom, and....

Point 6:
The yarn store is closed on Tuesdays! Ahhhhhhhhhh!

~~~~~~~~~~~~~~~~~~~~~~~~~~~~~~~~~~~~~~~~~~~~~~~~~~~~~~~~~~~~~~~~

Okay, I'm done whining. So I leave you with two semi-decent shots. They are of my rosemary plant that made it through the winter, much to my surprise. Not only did it make it, it flowered! I had no idea they flowered ever, but they do with these cute little purple flowers. I'm not sure if it affects the flavor of the leaves in the way that bolting does on basil and lettuce, but even if it does, I'm okay with it. This and the thyme made it through a winter where they should have perished forever, so no matter how they taste, they are winners in my book!

Monday, April 10, 2006

Some Assembly Required

So yesterday I finally felt well enough (after 4 days of being very sick) to plant my little seeds. So I layed out my labels and my seeds...


Then I stuck my little peat tablets in the flats, like so. These things are really awesome. Just add water and they spring up like crazy. I really thought it would take longer and more water, but I was very, very wrong. You see, I hadn't figured out how many of the tablets I was going to use yet and I only filled the first flat with water.....but they are all attached and all sitting in the same drainage bin. And, well, the water drained into the bin and some of the other pellets got wet from underneath, and my flat looked like this, when I had only put water in that first section. The first section, however looked lovely, like this:


So, after I got the peat all squished into the pots
I put two seeds into each hole in hopes that at least one of them makes it out of the pair. I did this with all of them except the peppers because Thomas Morgan was really stingy on the seeds there. I literally only got 8 seeds total. Everything else seemed like a decent amount but those. However, what is nice is that within the paper package, Thomas Morgan has another foil wrapped package. Like those ones that hold the seasoning inside Ramen noodles. Don't look at me like that, I know that you were starving once too and ate Ramen Noodles! (or some equivalent paper flavored noodle) Some of us theatre folk have even gotten a little too creative with them. Ahem. Moving on...
So here is my pretty flat all planted. Okay, well, almost. I got it all planted and re-watered, covered and situated, and hiked it upstairs trying, for once, not to trip over my own feet, and I got it all settled and realized that I hadn't planted the 7 million dollar flowers. So, I hiked it back downstairs and planted those.
They were the tiniest seeds ever. It was like trying to plant poppy seeds only they were pointy, and not as dark, which made them harder to see. So I sprinkled some over the holes and I hope they work out. I also hope I didn't get any on the other plants. The last thing I need is million dollar purple flowers growing out of my tomato plants.

Now finally everything is upstairs and in its little home under its radioactive light. The cover will stay on until they begin to emerge. It's supposed to, and I hope it works out this way, all happen at once based on the germination times. The flowers might be a little behind, so I'm going to have to work something out there. The big flat is nice to keep them all together, but not helpful at starting seeds with differing lengths of germination. The new wee plants need the air circulation and the germinating ones need the humid conditions. I forsee some strategically placed seran wrap in their future.
In the mean time they will sit on the heating pad (still trying to work out the correct number of towels between the heater and the plants to get the temp right. It was awfully warm this morning, and I hope I didn't cook them!), under their 16 hour timered light and with my hopes that at least one of these little guys comes up.

Wednesday, April 05, 2006

Before I get started I wanted to thank everyone for their kind comments and help on my Oak ribbed socks and my weirdo toe issue. My plan is to frog the toe and move on with my life. Turkish cast on - here I come!

End of knitting content! You have been warned!


What you see here is my newly built grow light system. Last night I went to Home Depot and found this "plant" light for my grow light. I originally had bought two clip lights and some flourescent light bulbs to put in them, but started to doubt myself after the 55th time boyfriend said "are you sure that will work?" Since the bulbs didn't say "plant" or "grow" anywhere on them, I decided to hunt a little more. I found this kit amongst the other flourescent lights - that being nowhere near the nursery. Go figure.
However, the kit only contained the fixture and the bulb, no frame or thing to attach to. When I got home, I showed this to boyfriend and he kindly, and quickly I might add, rigged this little baby up for me. Isn't that sweet? What I was thinking was far more complex and too cumbersome, plus I was (and still am) icky sicky, so I wasn't going to get it done anytime soon. Now it is all done, and all I need to do is plant. Which is what that thing underneath is for. It's a 72 plant flat with a little peat moss disc in each cup. All you do is soak the disc in some water and it expands to fit the cup
. Simply make a little hole, with say a pencil, and put the seed, or two, in and cover. Cover the flat loosely, turn on the light (with the timer to keep it on 16 hours a day - also purchased at Home Depot) and you're done until they sprout. Just keep them watered.

So what am I planting you ask? Well have a looksee <------------ Those are almost all the seeds that I bought. I picked up two more packets last night of ones I couldn't find at the nursery. Two cucumbers, one pickle and one slicing. In the picture we have (starting from the top left) zucchini, cherry tomatoes(sugar golds), Brandywine Heirloom tomatoes, Unicorn hybrid sweet peppers, tomatillos (which I know nothing about). Second row starting at the left: Masterpeice cucumbers - which I may not plant because I got the bush variety that I wanted and these might be vines, romano tomatoes, Sugar pod peas, Tyee spinach, Olympia Spinach and buttercrunch lettuce.

And then there's these flowers. Boyfriend came with me to the nursery, and he can be dangerous there since he likes his lawn and he likes his gadgets, however, he spotted these flowers that he liked and and gave them to me. The observant among you will notice that these seeds say FREE! They were supposed to be free with the purchase of 2 Thompson & Morgan seeds, which I bought, and when we got to the register I somehow owed over $8,000,000. Do not adjust your monitor, that is the actual amount. Apparently my FREE! seeds cost over 7 million dollars. Quite a deal, dontcha' think?

Anywho, I know this seems like an insane amount of crops, but it's not as bad as it looks when you realize that the peas, lettuce and spinach are cold weather crops that I should have put in the garden last weekend(oops), and the lettuce/spinach is one head per seed. You have to keep planting lettuce to keep growing it (except looseleaf varieties, of which I have none). I'm also planning on making tomato paste and crushed tomatoes to can, hence the large amount of crops there. I think most of these are indeterminate (meaning they keep producing until the weather changes - as opposed to determinate which produces a crop once a plant, once a season, all at once) which will make canning both harder and easier. I won't be able to bushels at a time, but we're talking about a small kitchen a probably canning 7 quarts at a time. There's no factory capability here ;) So indeterminate might keep me sane (er).

So that's where my gardening sits. I'm splitting my time between gardening and knitting lately so the knitting is slow, but both are keeping me equally sane. Well....at least out of the crazy house, that is.

If you got this far, thanks for reading! =) Have a Happy Wednesday!

Tuesday, April 04, 2006

What's going on here?

So I started a toe up sock with Wendy's Generic toe up pattern with some Koigu that I ordered awhile ago. With Koigu's limited yardage, and my large feet, I decided it would be a good opportunity to learn a toe up pattern. I also figured that since it's Koigu KPPM that it would be a good reason to just do some simple stockinette socks to ease my mind after running around like an idiot spring cleaning the house and the garden, and planting like a maniac.
So I began on Sunday and after having some issues with the crochet chain provisional cast on and having to redo it three times, I got it rolling, and I was good to go. (Note to self: if you crochet the chain backwards by pulling the yarn to the other side of the hook when you pull it through the loop, it will not unzip. Ooops). I figured out the short row shaping thing after watching Heather struggle with it on her purse, and I didn't have any problems until I went to do the other half of the toe. The first half is just wrapped short rows, which now make sense to me, but the other half was double wrapped rows and involved including the wraps and the stitch and k3tog. I understand this and didn't have any problems on the knit side as you can see above. It's a little choppy (and a crappy picture. Daylight savings ruined my morning light), but I think for a first try it looks good. But when you look at the other side (this picture) of the toe where it was P3tog, it looks like poo. I guess I'm just not sure how you P3tog with the wraps. I'm able to put my needle in the wraps from the left side then up through the stitch when I knit, and get the yarn through, and it looks fine. However, when I do the purl I have to lift the wraps up onto the left needle in order to convince the yarn through. I think this might have been what made those little bumps there, but I can't figure out another way to do it. I can't insert my needle from the left or the right through the wraps then through the stitch and pull the yarn through all three peices. I thought about using my current nemesis the crochet hook, but at the time, I didn't realize that what I was doing was creating these bumps, so I didn't look for an alternative.
So at this point, I'm at a loss for what to do. I'm totally willing to frog this little bit of a toe, especially since it's got its fill of mistakes - not big ones, mind you, but together they make a bit of a mess - but I'm not sure that I'd be able to fix these bumps by simply doing it over. I need another plan of attack. So, what do you think? How can I fix this mess without trying a different sort of toe? I like the shape of this toe and what little there is feels good, but this wrapped short row thing is kicking my butt.

Oh, and if anyone is interested, these pics and article at knitty are really helpful, but they don't explain how to do the purl side of the short rows. It does clear up the toe up stuff. Just note that the amount of sts she uses in the article are for demonstration and not necessarily to size.